Showing posts with label Food And Fun. Show all posts

Tuesday, February 4, 2014

B's Dairy-Free Creamy Creole


I was craving a spicy creamy creole dish last night, but I could not find one single recipe online that didn't use heavy cream! So I came up with my own and it was soooo yummy! Here's what I did…

Ing.

- 1 med. onion
- 2-3 bells peppers, one red, one yellow and/or orange
- 3 garlic cloves
- Almond milk
- Chicken broth
- Tomato paste (I like to use the one with italian seasoning for more flavor)
- Creole seasoning (like Tonys)
- Shrimp
- Hot italian sausage
- Fusilini brown rice pasta
- *red pepper flakes
- *sour cream
- *parmesan cheese

Chop onion and saute in a pan with olive oil (can use butter for a richer flavor). When soft, add julienned peppers (remember they will cook down so add a lot). Add 2 t. creole seasoning and some pepper and continue to cook veggies a few minutes until the onions are caramelized and peppers begin to wilt. Add garlic and cook until garlic is slightly browned and fragrant, about 2 minutes. Add 2-3 T tomato paste with veggies and cook until combined. Add about 1/2 C. chicken broth, then about 1 C. Almond milk. Add a sprinkle of red pepper flakes at this point if you desire an even hotter dish. Bring to a boil and let it simmer a few minutes until the sauce begins to thicken. At the end you can add a dollop of sour cream for an even creamier dish but it's really not necessary, it becomes pretty creamy with just the almond milk. If the sauce gets too thick add more broth and almond milk until desired consistency. 

In the meantime while working on your sauce, cook pasta, sausage and shrimp. (I didn't have shrimp so I cooked up a salmon fillet I had in the freezer, it was really good in the dish! Something different). When the sauce is done add everything together in one big pot. Sprinkle with grated parm cheese when your ready to serve if desired. 

Wednesday, September 5, 2012

Heaven in a cup

Okay, so lately my new obsession is iced coffee. like REAL iced coffee. The kind that is cold brewed. It really is the best way to make coffee. When you cold brew coffee you can really taste all the delicious rich, bold flavors of the coffee and prevents the bitterness you get when brewing coffee hot. Here is my recipe for the perfect cup of iced coffee..

3 cups ground coffee. The darkest and boldest roast you can find.

9 cups cold water.

Add ground coffee to a large airtight container. Pour water over coffee grounds. Secure lid onto container and let coffee sit at room temperature 12 hours or overnight. When time is up strain coffee using a french press or through coffee filters. And Voila! You have the most delicious iced coffee! Coffee will stay good in your frig for about a week. When ready to drink serve over a large glass of ice. I like to us a flavored creamer with mine. 

Sooooo yummy! You gals will want to take a coffee break every day!


Mmmmm... nom nom nom

So sit back and relax with this tasty treat and make it a great day!

Sunday, August 19, 2012

A Must Make!!


Nothing satisfies my craving like these Pioneer Woman Enchiladas! I have made them multiple times and I can't get enough! I feel like I could eat them every day. 

For the red sauce I used a simple tomato sauce (the kind you find in a can without all the extra Italian seasonings) because it's all I had. But normally you would use the red sauce you would find in the Mexican food section of your grocery store. If using the simple tomato sauce like I did, add about a tablespoon of any hot sauce to give it more of a Mexican flare. The first time I made the enchiladas I added the black olives like in the recipe. I then discovered my five year old husband was spending his time trying to pick out all the olives instead of enjoying his meal, so I don't bother with the black olives anymore. And I certainly didn't even attempt the green onions. And it is still good with out the extra ingredients. 

The only other change I made was using wheat tortillas. I guess they make me feel like I'm being a tad more healthy. I would recommend trying the wheat tortillas they are quite good! I don't bother frying them before hand. Oh and I used a little less cheese.

Besides all that I followed the recipe exactly and they came out delicious! I really love the idea of making a homemade red sauce. So much better then anything you can buy. Enjoy!!

Monday, November 21, 2011

Baking Day Plan: Butterhorns,"Snow Balls", and Carrot Cake Cookies

mise en place before baking homemade cookies


For the year before I was pregnant, I was baking pretty much everything from scratch...bread, bagels, rolls, pizza dough, English muffins, soft pretzels, pita bread, muffins, granola, granola bars, and more, I'm sure. I was a baking MACHINE!

And it was really fun, frugal, easy, satisfying, and everything tasted SO much better than store bought. It's so great knowing and controlling everything that's going into your baked goods..and scary when you realize how basic everything should be and all the junk added to everything in the stores!


But with a toddler running around now, baking just seems incredibly daunting.


I know I need to just jump back into it. I do miss the satisfaction of it. And I would really love to have homemade healthy snacks for my daughter.

So I decided to start doing "Baking Days" again. By dedicating a few hours once or twice a month, I can store extras in the freezer and get the mess over with all at once.  Plus, it really helps to start with a plan in place.

If you've never baked from scratch before, I'd highly recommend giving it a try, even just starting with one recipe. I started off making bread and dough with my bread maker but lately make just about everything using the dough attachment for my Kitchen Aid mixer (which I LOVE..thank you Aunt Linda!!).

I thought I'd list my baking day plan here on the blog, so you all can keep me accountable! My husband is deploying with the Air Force the beginning of December. I'm trying to fit in as much Christmas before then, so I'll get started on Christmas cookies. I also have some pumpkin to use up before it's out of season.

I'm going to try out some new recipes for "healthier" cookies and snacks...made without or with limited refined sugar and flour. I will update you with how everything turns out!


Here are the recipes I'm planning on making (baby permitting!):
Chocolate Butterhorns (like chocolate croissants..AMAZING!)
My all time favorite "Snow Ball" Christmas cookies
Itty bitty carrot cake cookies
Pumpkin pie banana chunk oatmeal cookies
Wedded Bliss Soft Ginger Cookies
Pumpkin butter oat squares


Non-Baking items:
maple-cinnamon-almond-butter-with-hemp-flax-and-chia-seed
And do something with the beautiful head of cauliflower I got at the farm stand and has just been sitting in my fridge.


You'll notice most of the recipes come from a vegan blog. When looking for "healthified" recipes, I've found vegan recipes are a good place to start (like my yummy vegan Pumpkin Bread Recipe). Sometimes I un-veganize them though, depending what I have on hand (ie. butter and eggs).


A little over ambitious, I know. I just got a little excited about getting back into it. Rule #1 though, I don't stress about what I don't get done.  I'll probably give myself several days to get as much done as possible. I'll let you know soon how it goes!

Friday, October 28, 2011

Pumpkin Mac & Cheese


Yes, that's right. Pumpkin Mac and Cheese. I saw this recipe and thought, "I HAVE to try that!"

Friends of ours are having a "Pumpkin Party" this Saturday and everyone is to bring a pumpkin food or beverage (I'm going to be so pumpkined out after this month! I think I've had something pumpkiny like everyday! :) So I figured everyone will probably bring something sweet because there aren't too many savory pumpkin recipes that come to mind. I was searching through recipes for something different to bring to the table, and I came across this Rachel Ray recipe: Pumpkin Cheddar Mac & Cheese

I did a test run last night and cut the recipe in half (which was still more than enough for Immanuel and I). It was SO different and really yummy! Immanuel gave it his approval, and you know how much that boy loves his mac & cheese! The cheese sauce reminded me of a beer cheese soup. The pumpkin adds a creaminess and an added depth of flavor, although you can't really taste the pumpkin.

*A few notes:
- I added chicken to make it more of a meal.
- I also used brown rice pasta to make myself feel better about eating such a rich heavy dish.
- Be careful with the spices... nutmeg, clove and cayenne are strong spices... you don't need a lot and you can always add more if you need to.
- I used a Pumpkin Beer. It only seemed right. And you can drink the rest of it with the meal which pairs perfectly!

Ok now give it a try and let me know what you think!

Here is the recipe:

Ingredients

  • 1 pound whole wheat or whole grain short-cut pasta, such as rigatoni or penne
  • 4 tablespoons butter
  • 3 slightly rounded tablespoons flour
  • 1 cup amber beer
  • 2 tablespoons honey or maple syrup
  • 2 cups whole milk
  • A couple of pinches ground cloves or 1/2 teaspoon allspice
  • About 1 teaspoon ground mustard
  • A pinch of cayenne pepper
  • Freshly grated nutmeg, to taste
  • Salt and pepper, to taste
  • 1 14-ounce can unsweetened pumpkin purée or 2 cups puréed fresh roasted pumpkin or butternut squash
  • 2 1/2 cups shredded sharp yellow cheddar cheese, divided
  • Sweet paprika, for sprinkling
  • Chopped parsley or chives to garnish

Yields: 4-6

Preparation

Bring a large pot of water to a boil. Salt it and cook pasta to al dente. Drain and reserve. Preheat broiler.
Step
Melt butter in a medium saucepot over medium heat. Whisk in flour, cook for 1 minute, then raise heat a bit and add beer. Reduce until almost evaporated then whisk in honey or syrup and milk. Season with cloves or allspice, mustard, cayenne, a little freshly grated nutmeg, some salt and pepper. Thicken to coat spoon, a couple of minutes, then taste to adjust seasonings.
Step
Whisk in pumpkin purée then stir in about 2 cups grated cheese with a wooden spoon until melted. Combine pasta with sauce and arrange in a casserole or individual ramekins. Sprinkle remaining cheese and a light dusting of paprika. Broil to brown and bubble. Garnish with chopped parsley or chives.

Monday, April 25, 2011

Orgain


I'm usually a little afraid to try "healthy" pre-made protein drinks or other health drinks. But Mom bought me one of these to try so I figured I'd give it a shot. I mean, with all the healthy stuff that is packed into the 11oz. container, I figured I could at least force it down to get some nutrients into my body. I took one sip and couldn't believe how good it was! I keep a few of these in our fridge for mornings when we are running late and don't have time to make breakfast or when I know it's going to be awhile before my next meal. I know they are a little pricey, but the convenience of just being able to grab it on the run, and all the healthy stuff packed in to it is worth it for me every once and awhile. You can find them at stores like Whole Foods.

Visit: http://www.drinkorgain.com to learn more about it and to watch a video.

Thursday, March 10, 2011

Decadent Chocolate Souffle for Two


Hi! I'm back! It's been a busy couple of weeks. I've been wanting to post on here for awhile but haven't had the time to sit down and put the time into it. Something I've been wanting to share is this Chocolate Souffle for Two recipe that I made on Valentine's Day. They were heavenly! They were light and airy yet rich and decadent. Satisfies your sweet tooth but won't make you feel like you want to die because you are so stuffed. Which is good, especially if your meal was on the heavy side which ours was. (I made this Brown Butter Risotto with Lobster recipe and it was excellent. Try it out if you are looking for something a little different and special).

Another reason I love this recipe so much is because it only takes a few ingredients. Most of which you probably already have on hand. Follow the link here for the directions.

I have listed the ingredients below. My comments are in red.


Chocolate Souffles for Two
  • 3 ounces semisweet chocolate - 3 oz. is half a cup. I filled half the cup with semisweet chocolate and half with dark chocolate.
  • 2 tbs unsalted butter
  • 1 tbs coffee
  • 2 large egg yolks
  • 2 large egg whites
  • pinch cream of tartar
  • 3 tbs sugar - I used a little less than 2 Tbs
  • I also added about a 1/4 tsp of vanilla

Tuesday, March 8, 2011

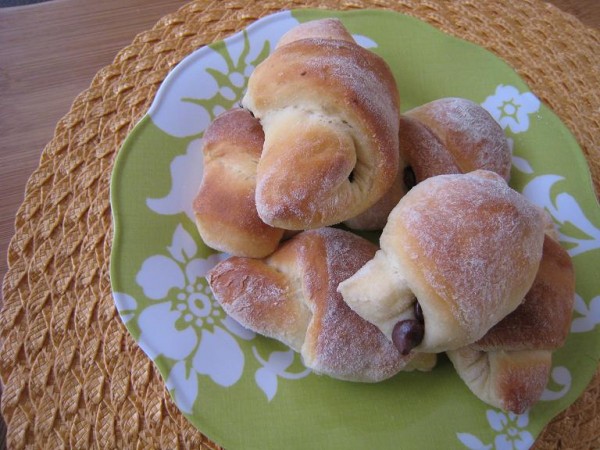
Recipe: Chocolate Butterhorns

I'm having some girlfriends over for a "Book Club" meeting this week. We call it a book club, and select a book each month, but usually nobody reads it and we don't really discuss it...it's just a great excuse to get together and visit over coffee/tea and snacks. I'd highly recommend starting one yourself!


I thought I'd make this amazing Chocolate Butterhorns recipe from LifeAsMom. I made some last Summer, but it was one of those things where I ate half of them before they even cooled...and the rest the next day, so I've been a little afraid to make a batch to eat alone again!

And, best of all, if you double the recipe and leave out the chocolate chips for some, they make great crescent roll-like dinner rolls for the freezer!

This recipe would also make a perfect homemade substitute for recipes that call for crescent roll dough.

Sunday, February 20, 2011

Recipe: Chocolate Chip "Un-Cookies"

I've been telling everyone about this absolutely amazing recipe for vegan chocolate chip cookies for awhile now, so wanted to finally share. 


It's the strangest things, but since going through my pregnancy my body has completely changed the type of food it craves and tolerates. Before, I used to crave anything heavy in carbs, cheese, meat, and sugar. Now, those things don't appeal to me at all. Many things I used to eat actually make me sick even. I think the main difference is that I'm more in tune with my body now and what my body is actually craving..not my mind. Deep, huh?

The problem is...I don't want to and can't eat like I used to...but, I don't really know what to make myself to eat anymore.

So I started exploring some new recipes and came across a blog called Love Veggies and Yoga, filled with tons of great recipes, especially desserts! I could never understand before how some people could be vegetarians or vegans (and, truthfully, thought it was a little crazy)...but, now that I don't really enjoy eating much meat and crave veggies I've been exploring looking into some vegetarian recipes to try out. And, honestly, most of them look really great!

I'll start sharing any in particular that I try and really like.

And I LOOOVED these chocolate chip "un-cookies" as I like to think of them. They taste (almost) exactly like real chocolate chip cookie dough. And it's the strangest thing to eat a ball of "cookie dough", knowing it's actually good for you..and not feel the grossness and guilt associated with eating real cookie dough. I love that I'll be able to make so many great tasting, healthy desserts for my baby girl someday too!

Seriously, try these out and let me know what you think! Here's the recipe directly from the Veggies Yoga blog. You can check out the direct link here.

Averie’s Raw Vegan Chocolate Chip Cookie Dough Balls
2/3 c raw cashews
1/3 c oats
2 Tbsp Agave
1 Tbsp Maple Syrup (Omit and use Agave to preserve true Raw Status if you care)

1 Tsp Vanilla Extract
1/4 c Chocolate Chips (or to preserve true raw status, take 2 Tbsp Raw Cocoa Powder and add 1 Tbsp Agave, optional dash of vanilla extract, whisk and blendSpread into a thin layer on wax or parchment paper, freeze.  Take frozen chocolate off parchment and crumble the shreds into the mixture as your raw “chips”.)
Recipe Yields: Approximately 17 Cookie Dough Balls


Optional Tweaks:
Add a dusting of cocoa powder, carob powder, or powdered sugar to the finished balls
Roll in raw cocoa nibs or shredded coconut
Rather than adding in chocolate chips, add raisins instead and add a dash of cinnamon to the batter for Oatmeal-Cinnamon-Raisin Raw Cookie Dough Balls
Flatten or mold into larger cookie shapes
Dehydrate for a more “cooked tasting” version of a chocolate chip cookie.  But gawd I love the raw dough taste so this is out for me!

Sunday, January 30, 2011

Best Chocolate Cake Ever. Period.


Austin and I are celebrating Valentine's Day tonight because he won't be around on February 14th. I wanted to make a really decadent chocolate dessert. I wouldn't say my favorite dessert is cake so I rarely make them. And I definitely have never made one from scratch before. But there is something fancy about cake so I thought it would be a good thing to make for a fancy dinner at home. Out of all cakes chocolate is probably my least favorite (gasp! I know). But this one might very well change all that! It is so moist, rich, chocolaty and just incredible! I kinda wanted to cry a little the first bite I took. I couldn't believe I made it! Definitely keep this one in your recipe file!

Double Chocolate Layer Cake Recipe

Sunday, January 23, 2011

Great Winter Dish


I was looking for something really different to make for dinner. I was starting to feel like I was cooking the same things over and over. I was watching the Foodnetwork (of course) and saw Giada De Laurentiis make this Osso Bucco. I really wasn't sure what Osso Bucco was but I did know that this dish look super yummy and comforting. Perfect for a winters night. And boy talk about an aromatic meal! This might very well be the best smelling dish I ever made. The aroma that filled the house was like a big hug!

The Gremolata sounded weird but I had all the ingredients so thought I would give it a go. It was actually really good and added to the amazing smells of the dish and gave it a punch of flavor. Plus it looked pretty on the turkey. The only thing I would say it to watch for how much broth you use with the turkey. Mine got a little watered down. I served the turkey over orzo pasta. Think this one is worth making!

Thursday, January 20, 2011

Healthy Chocolate Muffins


Tiffany's post about baking made me want to share this awesome recipe again. I made these Healthy Double Chocolate Muffins the other day and they were soooo good. Even better than the first time I made them. The recipe is from Tiffany's blog HERE. I love this recipe because it's almost impossible to mess up as long as you follow the basic guidelines. I will put the recipe below and tell you what changes I made in red at the bottom

1 1/2 cup almond meal (finely ground almonds)

•1/4 cup spelt flour

•1/4 cup unsweetened cocoa powder

•1 T baking powder

•1/4 tsp Sea Salt

•1/2 cup agave nectar (or other form of sugar)

• 2 whole mashed bananas

•1/4 cup organic almond milk

•2 organic eggs

•1/4 cup organic coconut oil* (warm first, it's a solid at room temp).

•1/2 tsp vanilla

•1/3 cup Dark Chocolate Chips

Directions:
Grease muffin pan (makes 12 muffins)

Preheat oven to 350 degrees.

Mix agave nectar, mashed banana, milk, eggs, oil and other wet ingredient. Add dry ingredients to wet ingredients. Fold in chocolate/walnuts. Spoon into well greased muffin tin. Bake about 13-15 minutes or until the center of the muffins springs back when touched. Let cool on a wire rack. Freeze really well.

*I used:
3/4 Cup Almonds I ground in a food processor
1/4 Cup Spelt Flour
1/2 Cup Brown Rice Flour
1/4 Cup Coconut Flour (I found this at Whole Foods)

* I recommend sifting dry ingredients together

* I used 1 banana instead of 2, and it was perfect. Not too strong on the banana flavor but just enough so you know it's there.

Baking Day: Introduction


I'm going to use this blog to help me get motivated to do Baking Days again. Helps with accountability.  I've gone over the Freezing Cooking basics here already and how it helps me with preparing regular, homecooked meals and keeping our grocery budget to around $40/week. Freezer Cooking is only one part of this strategy, which also involves regular Baking Days as well as Menu Planning. I'll go over Menu Planning in another post.

What are Baking Days and Why?

I guess the name is pretty self explanatory, but on Baking Days I make large batches of homemade baked good to use throughout the month.

For months before I was pregnant I was baking pretty much everything from scratch...bread, bagels, rolls, pizza dough, english muffins, soft pretzels, pita bread, muffins, granola, granola bars, etc. and it was really fun, frugal, easy, satisfying, and everything tasted SO much better than store bought. It's so great knowing and controlling everything that's going into your baked goods..and scary when you realize how basic everything should be and all the junk added to everything in the stores.

By dedicating a few hours once or twice a month, I get the mess all over with at once and can store extras in the freezer to use in our meals. This saves a lot of both time and money and helps us stick to our $40/week grocery budget (I'll be honest, it's closer to $50/week now that I'm making homemade baby food..but still, it's pretty low compared to the national average I think!)

If you've never baked from scratch before, I'd highly recommend giving it a try, even just starting with one recipe. You can use a bread machine (which you can use to make just dough, like for bagels), the dough attachment hook for a KitchenAid mixer (my preferred method), or the old-fashion way kneading by hand (which I don't know how to do exactly. Would love to learn. I bet there are some good instructional videos on YouTube).

Here are the recipes I'm planning on making today or tomorrow (baby permitting!)

Whole Wheat Bread (x2) (that's optimistic, I'll settle for 1)   I'm still looking for the perfect wheat bread recipe. May experiment a little.

Homemade Bagels

Bread Machine Buttery Rolls

Bread Machine Cinnamon Rolls (not sure if I'll get to this..but I had a huge craving for cinnamon rolls this morning..I had to take some leftover cornbread (because we are out of regular bread) and put some butter and cinnamon and sugar on it....I swear, I have more weird cravings now than when I was pregnant)

Whole Wheat Pita Pockets

This is overly ambitious, I realize. Oh well.. we'll see how it goes!
I'll share my results in another post when I'm done, with some more instructions and tips.

I challenge you to join me in making one baked good from scratch..even muffins count (which make great freezer breakfasts by the way!). I'd love to see your results.

Tuesday, December 21, 2010

Recipe: Peppermint Mocha Cookies


So I was sitting around the other day dreaming about Starbucks Peppermint Mochas (as I tend to do all holiday season), and suddenly (as if divinely inspired) I thought, "If only I could make these... at home...in cookie form!"

I was inspired by the Mint Chocolate Cookies Brittany posted the other day. But with a baby at home, just the thought of making the different layers was exhausting.

So I spent half a morning searching for the perfect recipe for Peppermint Mochas in cookie form, that met the following criteria:

1. Chocolate + Coffee + Peppermint.  I found a lot with 2/3 but I needed all 3
2. Quick and Easy....no different layers, no melting chocolate..I don't have that kind of time.
3. Doesn't use too much butter...because the dog ate 3 out of the 4 sticks of my last package...uggghh..
4. Clearly looks like a mint-chocolate cookie. I didn't want to surprise anybody who thought they were eating a purely chocolate cookie

I searched all over the internet and couldn't find the perfect recipe. So I combined a few to make my own. Oh my goodness...they are amazing! It's like nibbling on a peppermint mocha anytime you want...and what could be better than that?? Perhaps nibbling on a peppermint mocha cookie while drinking a peppermint mocha...whoa...now there's a thought!

Peppermint Mocha Cookies

1/2 cup butter
2/3 cup sugar
1 egg yolk
1 T. espresso powder* dissolved in 2 T water
1 tsp. vanilla
1 cup Flour
1/3 cup cocoa
1/4 tsp. salt

*Used 1 package of Starbucks VIA powder coffee mix

MINT FILLING:**

1/2 cup Powdered Sugar
4 T butter, softened
2 tsp. milk
1/4 tsp. vanilla.
1-2 Drops Peppermint Extract (a little goes a looong way!)
**Small volume, so beat until smooth in a small bowl.
Heat oven to 350 degrees.  Cream butter, sugar, egg yolk, milk, and vanilla. Combine flour, cocoa, and salt. Combine with butter mixture. Shape dough into 1 inch balls. Place on lightly greased cookie sheet. Press thumb gently in center of each cookie. Bake 10-12 minutes or until set. As soon as cookies are removed from oven, spoon about 1/4 teaspoon filling in thumbprint.  Cool on wire rack.
ENJOY!!

Wednesday, December 15, 2010

A Different Kind of Cookie

I saw Barefoot Contessa make these on her show and thought they looked pretty good. I was looking for a cookie that was a little different. These are like fruit cake but in cookie form. To be honest I've never even tried fruit cake before. I know it gets a bad wrap but it definitely is festive and from the reviews I read everyone seemed to love these, and they were a great alternative to fruitcake. They were flaky and crispy from the butter and chewy from the fruit and not too sweet. Worth a try if you are looking for something a little different and fun.

A few comments:
- I'm not a fan of cherries so I used cranberries instead, I think the cherry flavor can be a bit over powering so I would recommend cranberries.
- I added a little less cloves because its such a strong spice and added a little nutmeg and cinnamon to make it more holidayish.
- I used walnuts because that's what I had, it was good.
- Plan ahead because you need to let the fruit sit overnight in prepared liquid.

Dried Fruit Cookies

Ingredients

  • 1/2 pound dried figs
  • 1/4 pound raisins
  • 2 ounces candied cherries, coarsely chopped
  • 2 ounces dried apricots, coarsely chopped
  • 1 tablespoon honey
  • 2 tablespoons dry sherry
  • 1 tablespoon freshly squeezed lemon juice
  • 6 ounces chopped pecans
  • Kosher salt
  • 1/2 pound (2 sticks) unsalted butter, at room temperature
  • 1/2 teaspoon ground cloves
  • 1/2 cup superfine sugar
  • 1/3 cup light brown sugar, firmly packed
  • 1 extra-large egg
  • 2 2/3 cups all-purpose flour

Directions

Snip off the hard stems of the figs with scissors or a small knife and coarsely chop the figs. In a medium bowl, combine the figs, raisins, cherries, apricots, honey, sherry, lemon juice, pecans, and a pinch of salt. Cover with plastic wrap and allow to sit overnight at room temperature.

In the bowl of an electric mixer fitted with the paddle attachment, cream the butter, cloves, superfine sugar, and brown sugar on medium speed until smooth, about 3 minutes. With the mixer on low speed, add the egg and mix until incorporated. With the mixer still on low, slowly add the flour and 1/4 teaspoon salt just until combined. Don't overmix! Add the fruits and nuts, including any liquid in the bowl. Divide the dough in half and place each half on the long edge of a 12 by 18-inch piece of parchment or waxed paper. Roll each half into a log, 1 1/2 to 1 3/4-inch thick, making an 18-inch-long roll. Refrigerate the dough for several hours, or until firm.

Preheat the oven to 350 degrees.

With a small, sharp knife, cut the logs into 1/2-inch-thick slices. Place the slices 1/2-inch apart on ungreased sheet pans and bake for 15 to 20 minutes, until lightly golden.

link to recipe: http://www.foodnetwork.com/recipes/ina-garten/dried-fruit-cookies-recipe/index.html

-S

Thursday, December 9, 2010

Freezer Cooking: Getting Started


So speaking of getting back on track..I know I've been promising to give you guys some tips on my freezer cooking for months now. Well, the thing is, I did such a good job of stocking up before the baby was born, I'm just now, 5 months later, needing to do some cooking again!
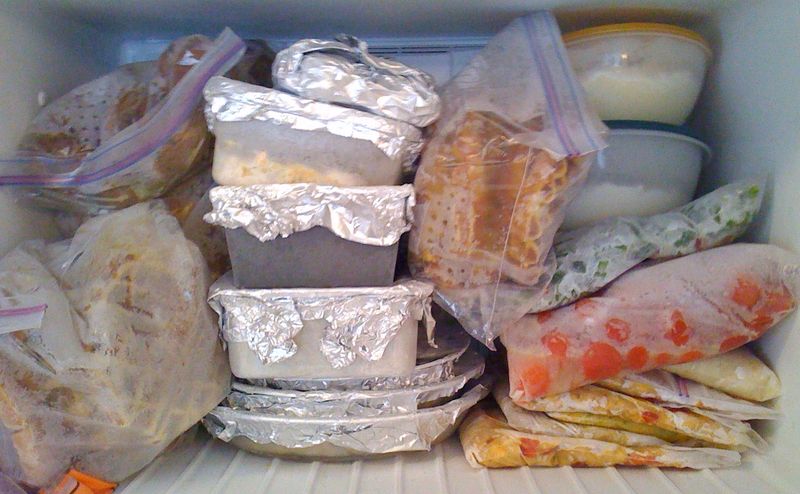
I got the idea from MoneySavingMom and it's one of those things that really changed my life for the better. It is so great to be able to have hot, homemade meals every night with hardly any prep time. And it's not just for dinners..also works great for breakfasts, lunches, snacks, and desserts. It also is one of my tricks for keeping our grocery budget around $40/week.  This last stock-up probably took me around 4 hours spead out during baby nap times and cost probably around $75-$100, I splurged a little since I haven't done any major cooking in literally months. I won't have to do any major cooking now (unless I want to, which is part of the fun..taking off the pressure to HAVE to cook) for the next month.

I'll give you some of my favorite tips and recipes. It's probably a little overwhelming, so I'll break it down into a few posts.


Tip #1:  The biggest tip and easiest way to start is to make at least double of something you are making anyways. For example, if you are making a lasagna for dinner, make 2-3 and freeze the others. It's hardly any extra work and now you have another meal ready to go. And then freeze dinner leftovers in lunch size portions for you husbands to grab for lunches.


Tip #2:  Take one ingredient and use in a number of different dishes. I usually focus on one meat at a time, and base that on what's on sale.  

For example:
Ground Beef:
Meat Loaf (make a big batch and freeze in single meal-sized portions)
Meatballs (freeze in a bag and serve with pasta or use for meatball subs)
Hamburgers
Taco Meat
Brown Bag Burritos (these are awesome. Individually wrapped burritos ready to grab-and-go. I usually add rice too to make them a little more hardy)


Chicken:
*Fajitas (cook with peppers and onions and seasoning)
*Cooked, breaded chicken breasts. Can use reheat and serve as is or use for other dishes like chicken parm.
*Chicken breasts frozen in a marinade (this is one of my favorite tips) bbq, teriyaki, italian dressing, taco sauce, curry sauce, etc.  I usually always do this right when I get home from the grocery store. It's a small step. But sometimes just deciding what to make is so tough when you're exhausted and don't feel like cooking.  I'll go.. "okay, I have some chicken breasts in BBQ sauce..I'll through that in the oven, heat up some baked beans and serve with some rolls." And dinner is done with 5-10 minutes prep time and little thought.


Rice:
This might be the easiest way to start. I'll make an entire bag of rice and use it to make different types of meals:
Asian - veggies, teriyaki sauce, chicken
Mexican - brown bag burritos, or make mexican rice with a little seasoning
Indian - curry sauce, chicken, any veggies on hand
Side dishes...cooked rice freezes pretty well and good to have on hand for a side dish.


Hope that helps to get you guys started. Let me know if you try it and have any success!!


TT

B's Secrets to Easy Entertaining

So I'm having what is really my first girls night. I've had my girlfriends over before of course, but I've never had an official "girls night party". And there are a few new girls coming that I've recently become friends with. I'm really looking forward to it! I plan to make it super Christmasy! 

I got stressed for a matter of a second, trying to think of what to make for food and wanting to impress everyone. But I quickly realized that the food isn't what it's all about. It is about getting the girls together and enjoying eachothers company! If I got stressed about what I would make every time I wanted to have people over I would probably never have company! 

So I think I found the secret to easy entertaining. Taking very simple ingredients and recipes and making it fancy! Tiffany, I loved all those recipes you sent me and those were exactly what I was looking for; simple, old-school food for large crowds that everyone loves! Such as dips and the classic cheese & veggie platter. I don't know how many times I've had people over and made the most basic, easiest thing in the world, and people would just "Wow" over it. I was always shocked. "Really? Its just BBQ chicken..."  But my secret weapon is to present it really beautifully on some fancy dishes and always garnish! Really fools your guest into thinking its something special and complex that took you forever to make!

I think you guys know Austin and my style by now. Laid-back and comfy! And my food is no different. I like to serve things my guest maybe wouldn't expect, but makes them feel all warm and fuzzy and right at home! For example a big pot of soup. I would say my second biggest tip to fun and easy entertaining is to do things that are YOU and that you are comfortable with. We aren't all Giada de Laurentiis! (even though I secretly wish I was) and I think your guest will really enjoy your own personal style. 

-B

Tuesday, December 7, 2010

Best Chocolate Chip Cookies of All Time!!

Ok you guys have got to try these cookies! Guaranteed best chocolate chip cookies you've ever had! They are a Paula Deen recipe in my Betty Crocker cookie booklet. 


Double Chocolate Chip Cookies

1 C. butter

1 1/2 C. creamy peanut butter

2 1/2 C. packed brown sugar

2 whole eggs

1 egg white

1/2 C. sour cream

2 t. vanilla

3 1/2 C. Better for Bread flour (* I used all-purpose flour and they came out awesome)

3 t. baking soda

1/2 t. salt

1 bag (12 oz) semisweet chocolate chips

1 C. mini semisweet chocolate chips

1. Preheat oven to 350 degrees. Beat together butter & peanut butter until creamy. Add brown sugar, beat until creamy. Beat in eggs, egg white, sour cream, and vanilla. gradually beat in salt, baking soda, and flour. Stir in chocolate chips.

2. On ungreased cookie sheet, drop dough by heaping tablespoon, 2 inches apart.

3. Bake 10-15 min.or until lightly browned.


Seriously. Do yourself a favor and make these. You're welcome.

-B

Monday, December 6, 2010

Yummy Cookies!


Chocolate-Mint Layered Cookies


3/4 C. butter

3/4 C. sugar

1 egg

1 t. vanilla

2 1/4  C. all-purpose flour

1/4 t. baking powder

1/4 t. salt

9 oz. bag semisweet chocolate chips

1 T. all-purpose flour

9 drops green food color

1 t. mint extract

1 t shortening or canola oil

1. In large bowl, beat butter and sugar with electric mixer on medium speed until creamy. Beat in egg and vanilla. On low speed, beat in baking powder, salt, and 2 1/4 C. flour until dough forms. Divide dough in half (about 1 1/4 C. each) place 1 portion in medium bowl.

2. In small microwavable bowl, microwave 1/2 C. of the chocolate chips on High 30-60 seconds or until melted. (*I made it 3/4 C. chocolate) Stir until smooth, cool. Add melted chocolate to dough in medium bowl; knead until well combined. To remaining dough, add 1 T. flour, the food color and mint extract; mix until blended. Wrap each portion of dough in waxed paper; refrigerate 30 minutes.

3. Pat chocolate dough into rectangle shapes. Place between sheets of waxed paper (*don't use flour. You need dough sticky). Roll to 10x6 inch rectangle, patting into shape with fingers as needed to retain rectangle shape. Repeat with green dough. Remove wax paper on dough, except for one bottom sheet on counter. Layer dough one on top of another. Press down firmly. Cut 3 equal stripes lengthwise in dough. Stack stripes so they are layered and press down firmly. Wrap in plastic and refrigerate for 1 hour.

4. Heat oven to 350 degrees. Cut dough into 1/4-inch slices. Trim dough as needed. On ungreased cookie sheet, place slices 2-inches apart. Bake 10-12 minutes or until edges start to brown. Cool completely.

5. In small microwavable bowl, microwave remaining 1 C. chocolate chips and add the shortening (*I didn't have shortening so I used canola oil and it worked just fine). Melt in microwave. Dip one edge of cookie in chocolate. Cool completely.


I was in the market for a different kind of Christmas cookie. I was bored with the traditional sugar cookie and chocolate chip. I wanted something different but still festive. I came across this recipe in a Betty Crocker Christmas cookie booklet and thought I would give it a go. It was fun to make something different and boy are they yummy! Nice and chocolaty and the mint isn't too over-powering. 

Mint is my new favorite this season! I used to not like mint, well I shouldn't say I didn't like it, I just never gave it a chance! It never sounded appealing to me. But that all changed when I had my first peppermint mocha at Starbucks. It was like Christmas in a cup! Now I think mint is the taste of the Holidays and I want to do everything in mint!

I think you gals should try this recipe. They are definitely a "Wow" cookie because of the layered mint and chocolate, and I guarantee any place you bring them they will be one-of-a-kind and quite special. Happy baking!

Thursday, November 11, 2010

Great Crowd Pleaser

Last night my group of high school friends got together for a girls night at my friend Lauren's house. We all brought an appetizer to share and what we wanted to drink. I went through a TON of recipes trying to find something that would be tasty, satisfying, not too weird, and easy enough to make. Its hard making something for a group that you think everyone will like. Since I've known my friends forever I know that they don't like to be super adventurous with their food, so I thought, what is something everyone loves? Pizza of course! So I found this Giada recipe that was a hit and it's super easy to make. I followed the recipe exactly and it came out perfect. Immanuel loved it too. I think next time I make it I will experiment a little and maybe add sausage or pepperoni (Immanuel's favorite) and green peppers. You can really do almost anything. It's a fun recipe that you can be creative with. Keep this in mind next time you need to feed a crowd! 

Recipe: http://www.foodnetwork.com/recipes/giada-de-laurentiis/venetian-rolled-pizza-recipe/index.html

-Steph